Badusb原理及制作并简单免杀实现远控

准备
- Digispark ATtiny 85
- Arduino IDE 1.8.4 (parrot 中的ide是2.x版本的没有Board Manager)
https://www.arduino.cc/en/Main/Software
- Arduino IDE 1.8.4 (parrot 中的ide是2.x版本的没有Board Manager)
- Digispark驱动程序 (Windows)
https://github.com/digistump/DigistumpArduino/releases
能够制作BadUSB的几种常见载体有:leonardo_Arduino、Phison、Teensy、Attiny85、PS2303(芯片)、Rubber_Ducky等,本次使用样本是diy的Digispark,看到芯片上标注的Attiny85。
Digispark http://digistump.com/wiki/digispark/tutorials/connecting 是一个基于ATTINY85微控制器的USB开发板,体积小且价钱便宜,功能方面则没有Arduino般强大。代码与Arduino大同小异,更可贵的是使用Arduino IDE来开发。淘宝上直接搜索Digispark就能看到了,价格在7-10元不等。
配置Arduino IDE
打开 文件->首选项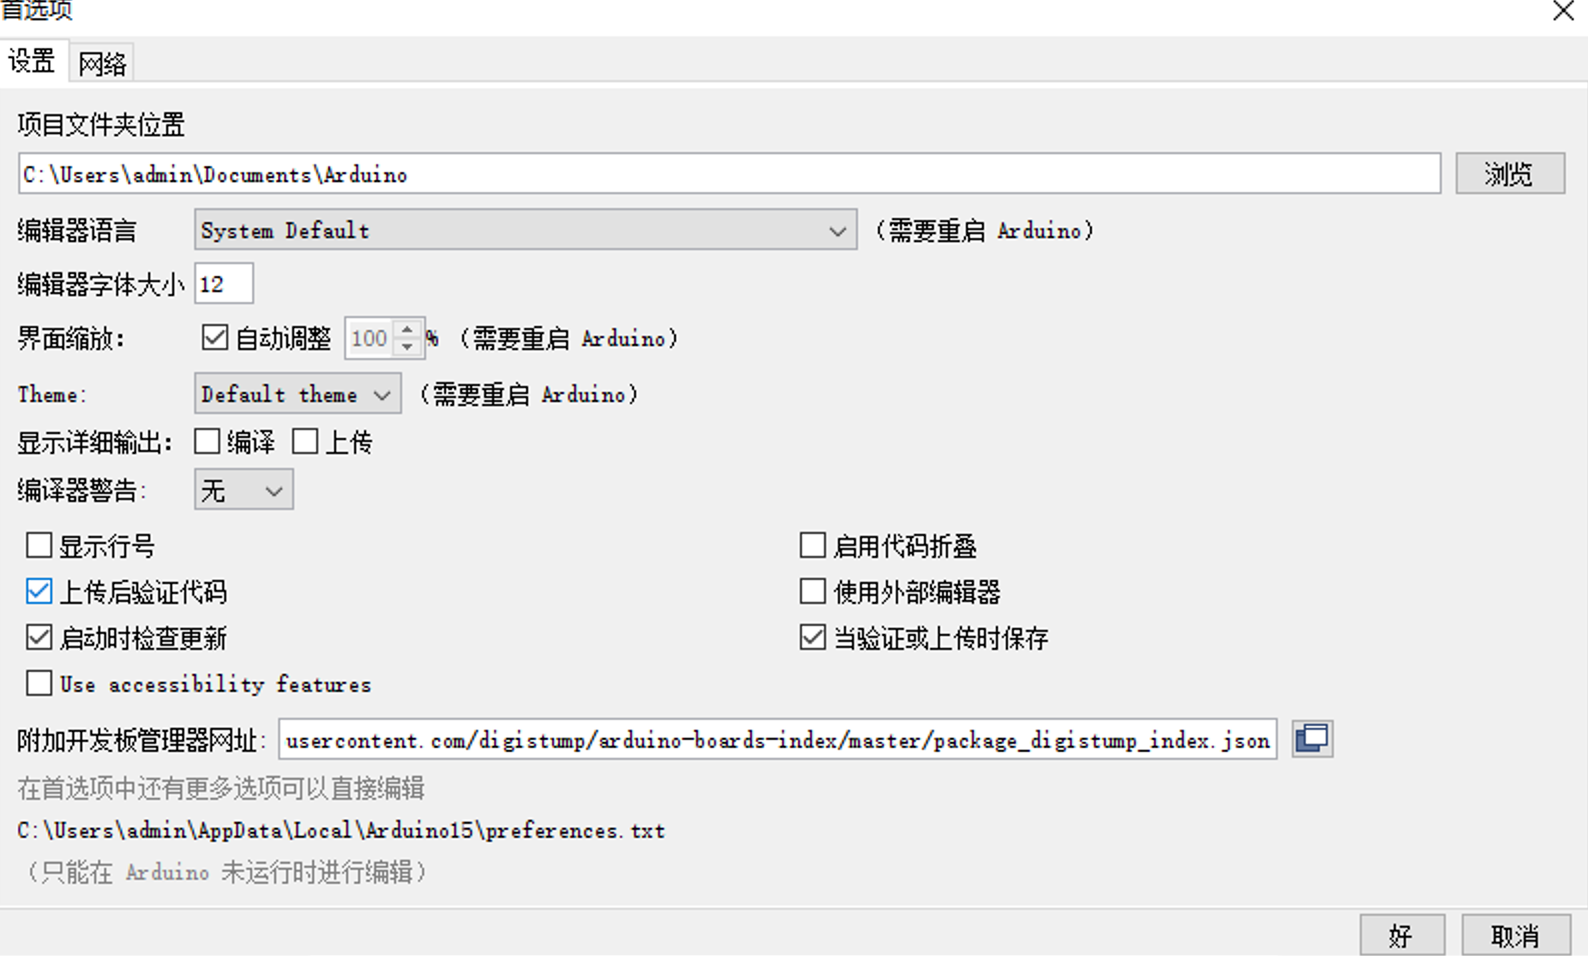
把这个网址添加到附加开发板管理网址
https://raw.githubusercontent.com/digistump/arduino-boards-index/master/package_digistump_index.json
然后打开开发板管理器
在Arduino中添加Digispark的支持
等待开发板管理器加载完成,搜索digistump并安装第一个Digistump AVR Boards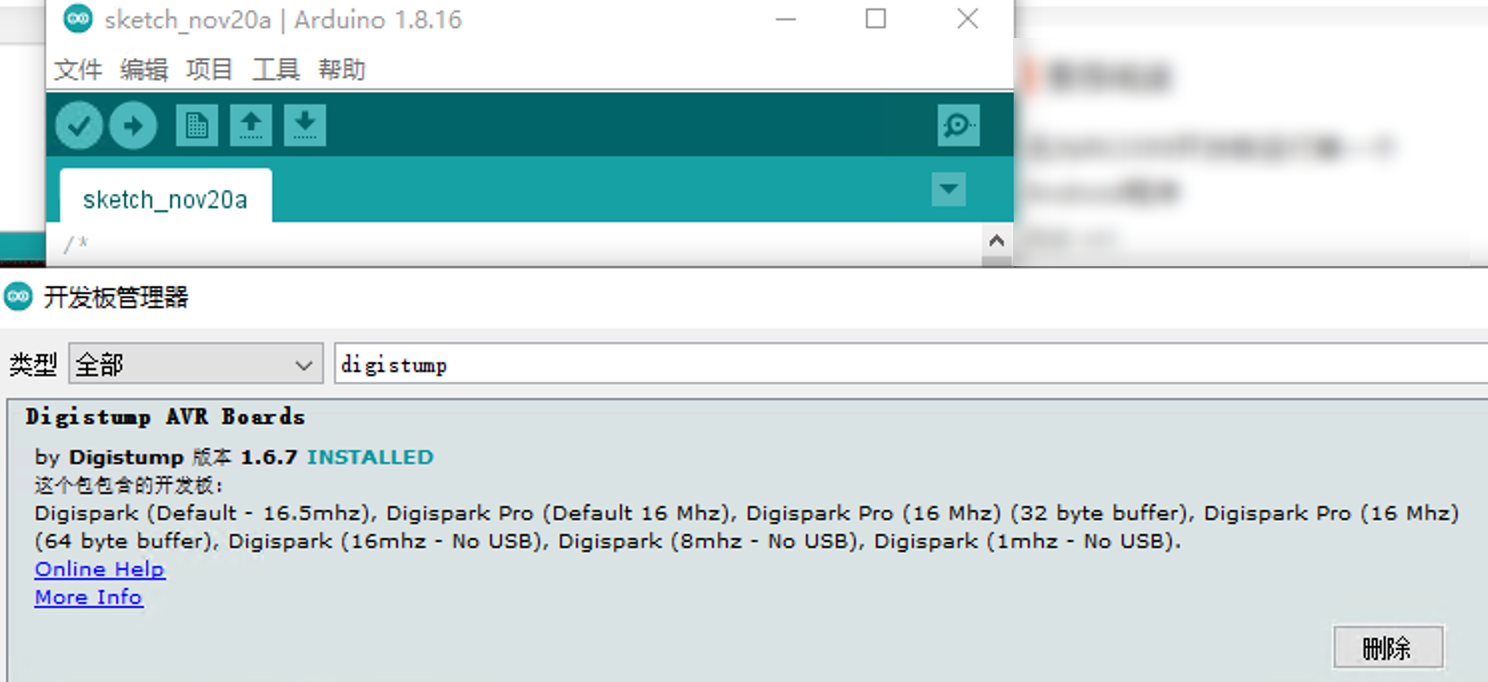
安装Windows下的驱动
打开上面的链接,下载Digistump.Drivers。
不下载驱动,会找不到设备。无法烧录。
制作与烧录
初次上手来一个helloword
1 | /* |
上传
Ardunio IDE中选择工具->开发板->Digispark (Default - 16.5mhz)
然后点击项目->上传等待编译完成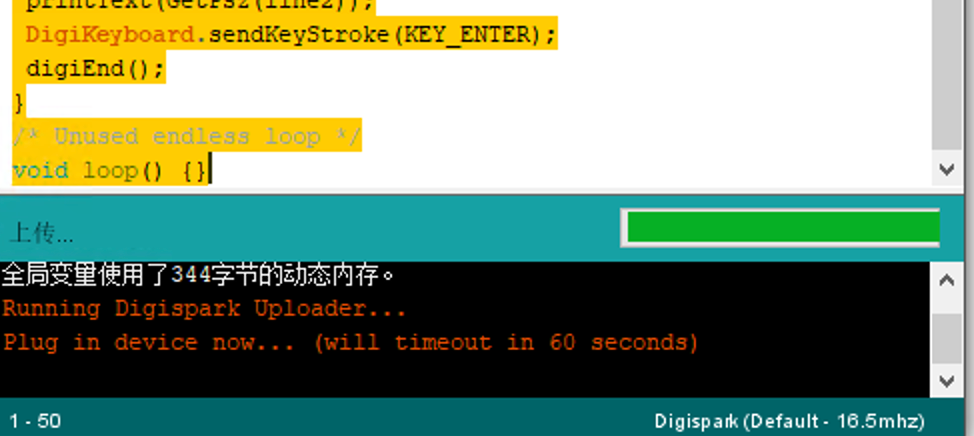
然后插入Digispark 开始上传
只要60s内插入,就可以写入脚本。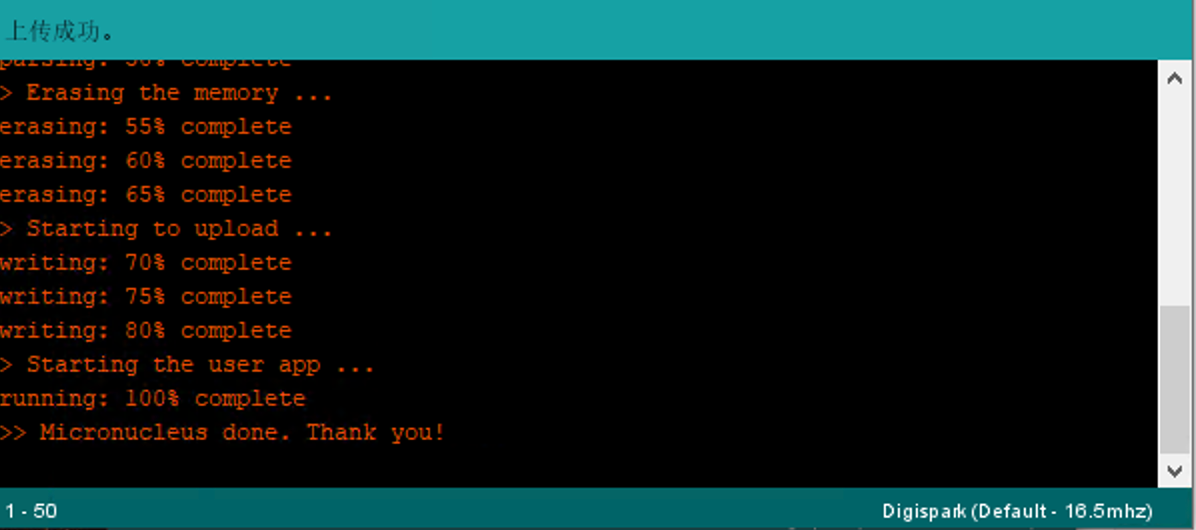
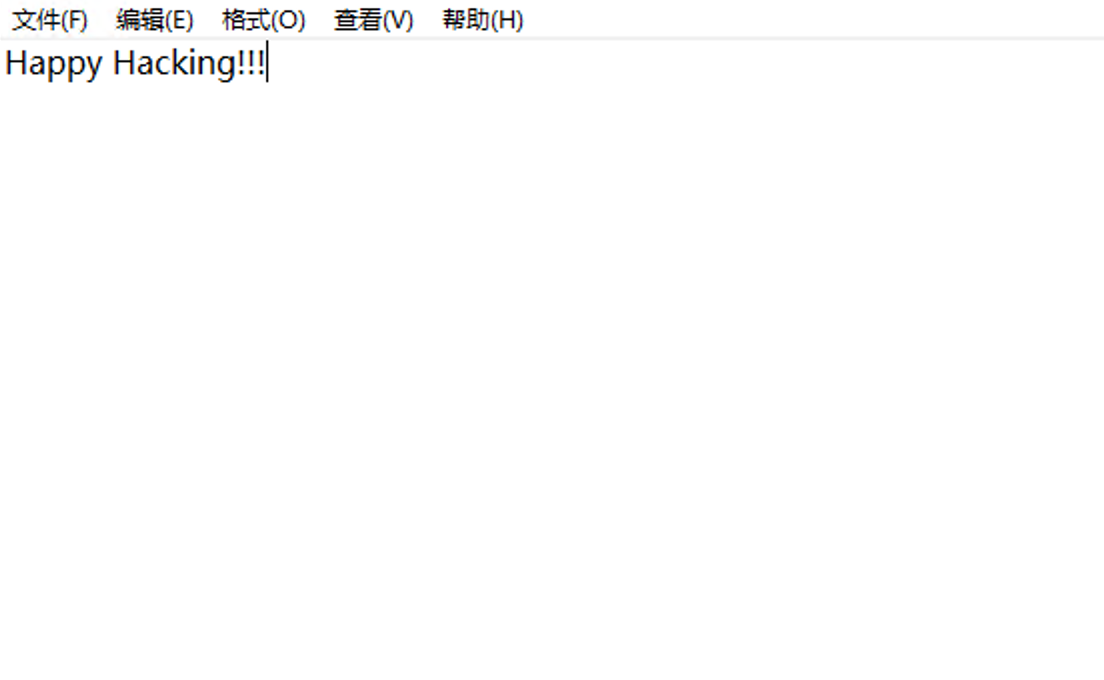
测试是否写入成功。插入u盘后,自动打开记事本写入字符
上线与免杀
windows上线的形式,基本上是psl或exe。利用隐藏cmd或者powershell执行命令。
https://github.com/hak5darren/USB-Rubber-Ducky/wiki/Payloads
参考链接
https://github.com/MTK911/Attiny85
https://devreyakan.com/en/attiny85-ile-20-per-second-wifi-sifresi-hackle/amp/
https://github.com/Catboy96/Automator/
https://github.com/hak5darren/USB-Rubber-Ducky/wiki/Payloads
免杀对比Invoke-Obfuscation混淆免杀过360和火绒 https://blog.csdn.net/csdnmmd/article/details/117454031
badusb 例子 https://gitee.com/wwy2018/BadUSB